
Viewing & Editing Asset Details
Learn how to view asset previews, check file information, and edit metadata and tags.
Opening the Asset Detail View
Click any asset thumbnail in the grid to open the detail modal.
The modal displays action buttons at the top and tab navigation below.
Action Buttons
Depending on your permissions, you may see some or all of the following buttons at the top of the modal:
Download -- Download the asset (opens a size/preset selector).
Share Media -- Create a share link for this asset.
Add to Collection -- Add the asset to one of your collections.
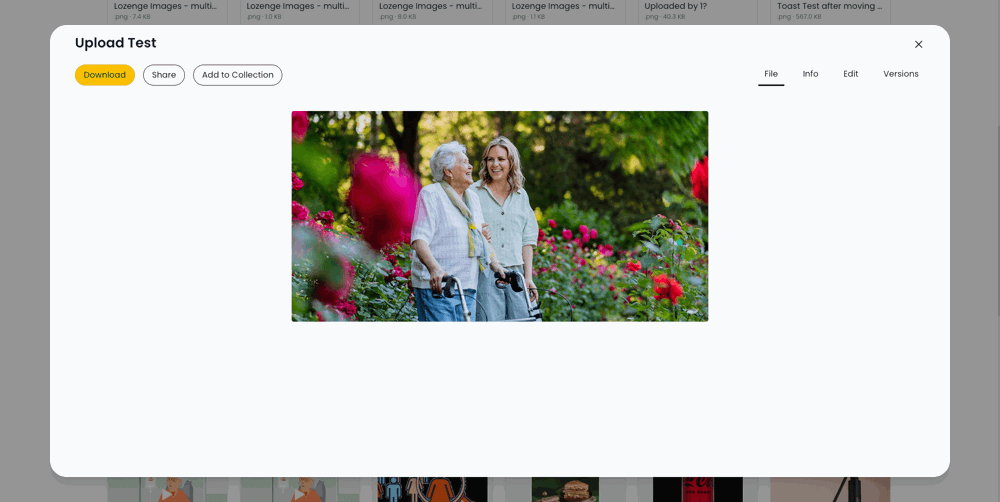
File Tab (Default)
The File tab is shown by default when you open an asset. It displays a large preview of the asset:
Images display at full quality.
Videos show an HTML5 video player with playback controls.
Audio files show an audio player.
PDFs, Office documents, and other files show a file type icon with the MIME type listed below it.
If an asset is embargoed, a semi-transparent overlay appears with an "EMBARGOED" warning.
Info Tab (Read-Only)
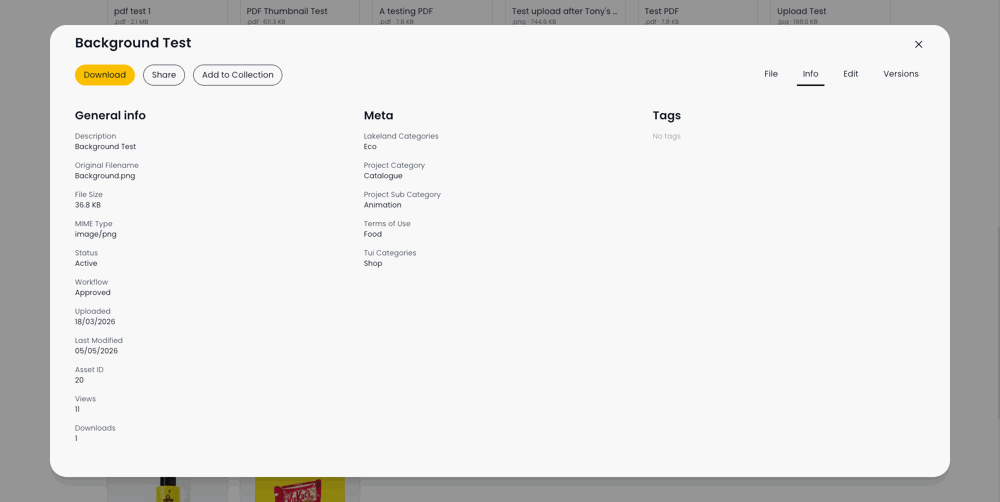
The Info tab provides a read-only summary of all asset details, arranged in three columns:
General Info
Description
Original Filename
File Size (formatted, e.g. "2.5 MB")
MIME Type
Status (Active, Archived, etc.)
Workflow Status
Upload date
Uploaded by (username)
Last Modified date
Asset ID
View count
Download count
Embargo date (if set)
Auto-archive date (if set)
Metadata
All custom metadata fields are displayed as read-only key-value pairs. For example:
Brand: STM
Category: Print Ad
Tags
Tags appear as clickable buttons. Clicking a tag takes you back to the asset library, filtered to show only assets with that tag.
Edit Tab (Requires Edit Permission)
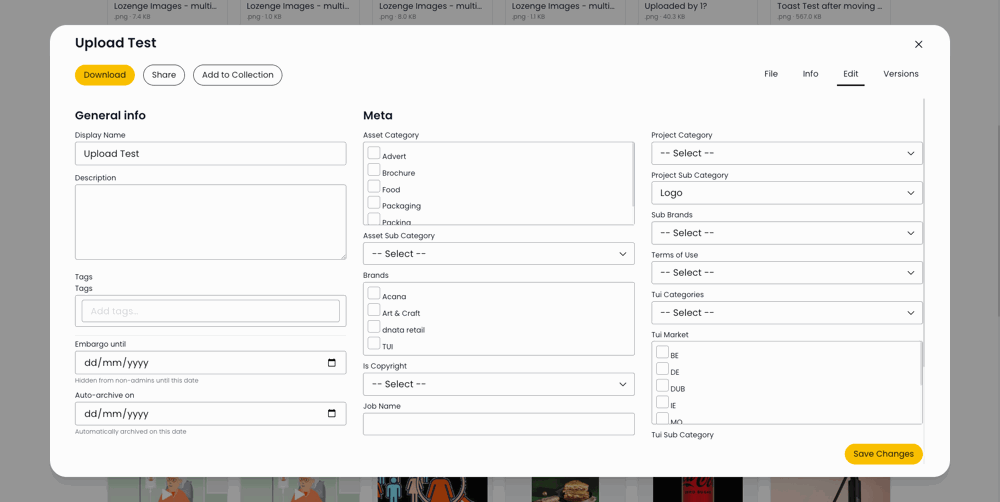
The Edit tab presents a three-column editable form where you can update asset details.
Column 1 -- General Info
Display Name -- text input
Description -- textarea
Tags -- tag input with autocomplete suggestions and usage counts
Embargo Until -- date picker
Auto-Archive On -- date picker
Columns 2 & 3 -- Metadata
All custom metadata fields appear as editable inputs matching their configured field type:
Text input
Textarea
Number
Date picker
Boolean toggle
Single-select dropdown
Multi-select checkboxes
Required fields are marked with a red asterisk (*). Where configured, help text is displayed below the field.
Saving Your Changes
Make your edits across any of the columns.
Click "Save Changes" in the sticky footer at the bottom of the modal.
A success or error message appears confirming the result.
Working with Tags
Tags are freeform labels you can add to any asset to make it easier to find.
Adding and Removing Tags (Edit Tab)
In the Edit tab, click into the tag input field.
Type a tag name and press Enter or comma to add it.
As you type, existing tags appear as suggestions in a dropdown, along with usage counts (e.g. "summer (42 assets)").
Added tags appear as coloured pills. Click the X on a pill to remove a tag.
Tags are case-insensitive -- "Summer" and "summer" are treated as the same tag.
Using Tags to Filter (Info Tab)
In the Info tab, click any tag to jump back to the asset library filtered by that tag.
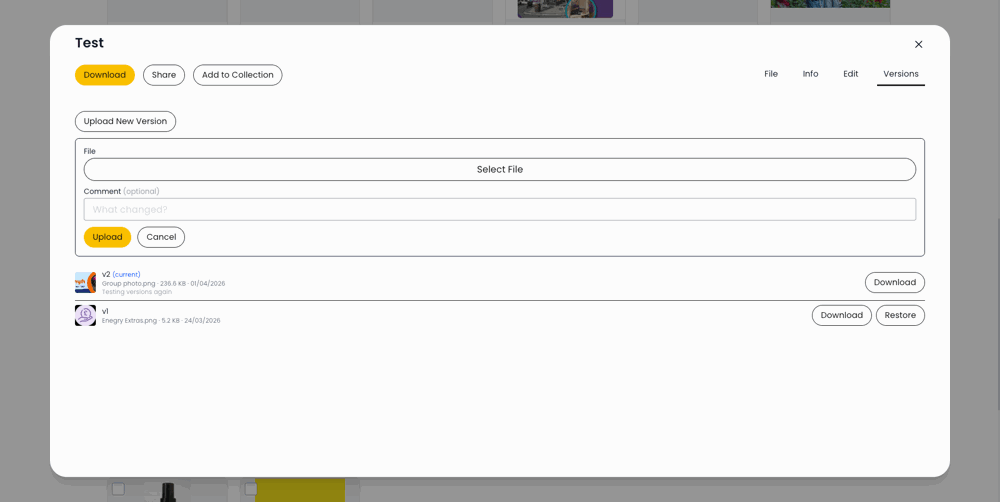
Version Tab
You can upload or restore versions of an asset here. For more details see the 'Version Control' user guide.
Tips
Use the Info tab for a quick reference of all asset details without making changes.
The Edit tab lets you update metadata and tags at any time, as long as you have edit permission.
Tags are a powerful way to improve asset discoverability -- use them generously.
Embargo and auto-archive dates can be changed even after the asset has been uploaded.